Friday, 29 January 2016
Death Drawing Take 2
Death Drawing Take 1
Here is my group's first attempt at filming our film task, as you can see, the editing hasn't been finished and no sound has yet been added, however, it wasn't long before we realized we had to re-shoot the entire thing, due to poor lighting and shot construction.
We originally thought filming went quite well as we had gathered all the shots storyboarded as well as extra shots of blinds closing, but when we took it into edit, we realised we needed to reshoot the entire film as it was too dark and we could get better shot construction.
Film Project
We were given the task to create a one minute film with no dialogue. My group decided to go with the genre of Horror.
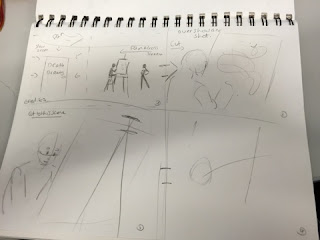
We originally started to write a script and found out that this was merely a shot list. We were then shown ow to write a script, however being that we only had one scene, the script came across at least to us more like a story.

This script was
then storyboarded with the shot list kept in mind.
Thursday, 28 January 2016
Red Baron's New Toys Script
We have been given a script that we have been tasked with designing elements and composing them into a storyboard.
Monday, 18 January 2016
Timing and Spacing Tests
After receiving some feedback on some of my previous work where I was told to improve on my timing and spacing, I created these little tests to try and improve on my T&S as well as how these effect the weight of the object. The were fun, quick little tests and I will be doing more of these in the future.
Aladdin Lip Synch Pencils
Here is a test I did to try and understand the lip synching process in animation.
I took a scene from Disney's Aladdin where the titular character is speaking, as he is one of my favourite animated characters, and analysed it frame by frame. I then went and traced the extremes of his speech directly off of the frames, and then inbetweened them myself where was necessary. In most cases my in betweens matched up close enough to work, how ever in one or two cases I got the mouth position in particular way off and had to reference the actual frame to correct it, without actually tracing it.
This was a fun test which allowed me to get comfortable with drawing the character, as well as draw using my new tablet, as well as giving me a basic understanding of how lip synching actually works. As this test was done through tracing, my understanding will only be limited, however I feel like it was an important step in me understanding how it should look, although I am going to go back and learn the mechanics of how lip syncing is actually done.
Friday, 15 January 2016
New Tablet
MERRY CHRISTMAS!!!
So for christmas I got a new graphics tablet, a Wacom Intous. I thought that I'd try out a few tests with the tablet just to get used to the feel of the new pen and tablet compared to my old Wacom Bamboo.


Another thing that I tried out was using the pressure sensitivity on the opacity as well as the scale of the brush, and I found it helped give me a nice, sketchy feel to my images and allowed me to sketch in a similar way to when I sketch in pencil. The character in the middle was a quick little design I came up with which I quite liked so i thought I would colour in. I tried a few new things here which I have wanted to try for a while but for some reason, have never really managed to do such as the shading on the character, I normally look at shading and just wonder how the artist gets the shading in the right areas, but here I just gave it a go and guessed where it would land on the face and am quite happy with the result even though I don't think its perfect. I plan on doing some more exercises like this, just using trial and error on the shading until I can get a grips on how shading actually works, as well as doing some research into the subject through lots of reference images on light and shade hitting objects. Another thing I tried was duplicating my main colour layer and setting the layer blending to colour so to change my blue guidelines into coloured ones so that they would fit in more. I decided to leave the guidelines in and not hide the layer as I am very much a fan of the sketchy look.
These two drawings were done following step by step video tutorials on the Disney Parks YouTube Channel(https://www.youtube.com/playlist?list=PLflf8xbnbx65Z2oa2F9uqKZxJJn-4Nynr) which are taken from the former Magic of Disney Animation attraction at Walt Disney World, which was one of my favourite attractions at the theme park as I knew in that building, they animated some of my favourite Disney scenes such as Be Our Guest and I Just Can't Wait to be King, as well as the bulk of Mulan, Lilo and Stitch, and Brother Bear.
Subscribe to:
Comments (Atom)


